Tuesday, 16 December 2014

Institutional Research - Napoleon Dynamite (Hess, 2004) Dylan Evans

Napoleon Dynamite - nine frames of the opening sequence


From analysing the opening sequences of films I have learnt that there are 3 key aspects when it comes to creating a film opening: Audio (music/sound), visuals (what the audiences sees) and the titles (the words that overlay the visuals).

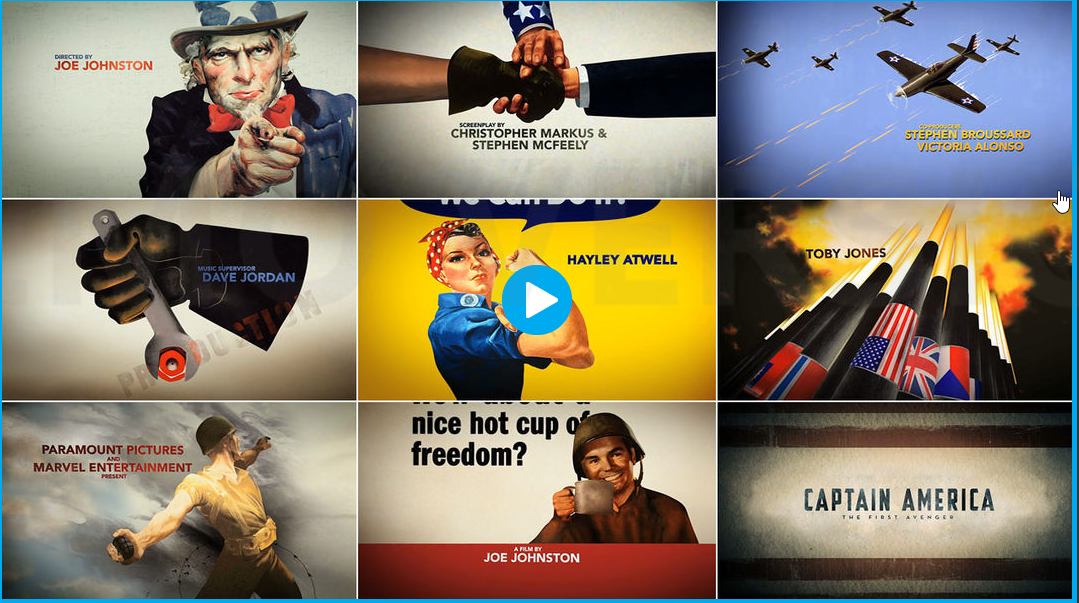
These title overlays highlight the people involved in the creation of the film from the production company to costume and make up.

From this task I learnt about all the different aspects of a film's opening sequence. When creating an opening sequence an editor would focus on 3 different things; visuals (what the audience can see), audio (what the audience can hear) and titles (what the audience can read). My opening sequence lasted 2 minutes and 20 seconds and contained a total of 20 titles. This is typical of an opening sequence lasting this long. Shorter sequences may not contain so many titles. Another thing I noticed was that the director was mentioned twice in the opening sequence highlighting his importance in the creation of the film.

The Incredibles (Bird, 2004)- The 9 frames of the opening sequence II Jack Gilbert


For this task we used a movie opening, like The incredibles, to create a movie titles timeline. Within this we discussed the people involved in the film, through the titles, and what the film may be about through the visual and the audio.

We created timelines around these and i found just how difficult it must have been to create this simple opening sequence, as the different visuals in the opening covered at least 3 minutes, and this was covered by the theme tune, audio track, specifically for the movie.

Wednesday, 10 December 2014

FILM OPENINGS – INSTITUTIONAL ANALYSIS- Captain America: First Avenger

Captain America: First Avenger 


In this task I have learnt how audio and visuals are used to give us information about the film and how the opening few scenes are used very effectively to show us what and who is involved in the film. i have also noticed how audio is used to portray the genre of the film. I investigated the opening to "Captain America" and this some of the audio and visual that i noticed during the opening.


I have noticed that this film opening compared to another film opening i did are completely different as the order that the title and credits came were at two completely different time.   

Thursday, 4 December 2014

Rule of thirds

The rule of thirds is a concept in video and film production in which the frame is divided into nine imaginary sections, as illustrated on the the top photo. This creates reference points which acts as guides for framing the image. Points of interest should occur at 1/3 or 2/3 of the way up (or across) the frame, rather than in the centre. Like many of those rules of framing, this is not always necessary but we need to know why we use before we break it.


Close up
We were given a task to take two still images, one using the rule of thirds and the other breaking it. We did this to see how effective it was, and what meaning it caused. It also allows us to see how breaking the rule of thirds can be used to our advantage.
In this example, we used Jack and he is positioned in the middle of the shot. His facial features are on the intercepting points of the grid. This conforms to the rule of thirds. We used this positioning to make his facial features stand out, and to direct attention towards his face.


However, in this example, we broke the rule of thirds as none of Jack's facial features are located on the intercepting points of this grid. We used this to create an unnerving and unnatural feel towards the image and therefore can be used when trying to portray a character as evil and unnatural.


Landscape

In the same way we used rule of thirds in the landscape shots to create a similar effect.
In this example we took our landscape shots, similar to our close ups. This is used to create a calm and peaceful nature shot. This can be done to make the location seem safe and natural.


In contrast, this photo breaks the rule of thirds. This can be used to make a location uneasy, unnerving and untrusting. It could be used effectively in a horror or thriller, because it does not follow the rule of thirds, which creates an un natural bond with the audience.


Dylan's Preliminary Task Evaluation

The purpose of our preliminary task was to see if we were able to apply continuity editing to our clips. We achieved this by using the 180 degree rule and shot reverse shot to make sure we did not confuse the audience. When filming there is an unwritten rule of where the camera should be positioned in order for a film to have verisimilitude.

Although it took a series of takes in order for us to get it right, I believe we worked efficiently with our time limit. There were a few mistakes at the start of the clip which we were unable to change in the time we had, such as the low key lighting in the hallway due to the aperture of our camera being on a low setting. Another issue we identified was that when we first entered the room there was no light, so we showed Patson entering a dark room which then appear illuminated on the inside as we had opened the blinds.

This is an example of a 'shot reverse shot' (over the shoulder shot). A shot typically used whilst filming conversations. We also used the 180 degree rule whereby the two characters were faced directly opposite each other. Throughout the scene we used continuity editing effectively to create one continuous motion. We did this through filming each shot around three times from different angles to make it more aesthetically pleasing for any viewer.

In our preliminary task we demonstrated our use of match on action by creating a scene whereby the character walked towards a door, opened the door and appeared on the other side as though it was one swift movement by filming separate shots and then cutting them after using final cut pro to create verisimilitude (make it appear as though it was natural and filmed in one take). Although the concept is simple, it involved a variety of different camera angles and editing techniques which will help us when it comes to creating our actual thriller opening.

Thursday, 27 November 2014

Stacio Preliminary Evaluation

In our preliminary task we used a lot of different types of shots
  these include a long shot at the start of the video with the camera
out of focused and was used to introduce one of the male characters
that took part in the video. 


Another type of shot that we used was a extreme close up
of Jack's hand. This shot was an important part of the video as we 
had to make sure that the same hand he used to open the door
was used in the next shot shown letting go of the door in the 
next scene. If we messed this part up the film would not look
as realistic. Therefore when we were filming and editing 
we had to make sure that we made sure that it was the right hand
and the shoot flowed smoothly.

We also used over the shoulder shots throughout out our prelim
when we were trying to capture the conversation between the two male
 characters in our film. We did this to create a connection 
between the person watching the video as the shot creates a feeling
of you being there.
In addition we followed the three principles of continuity editing, which are rule of 180 , shot and reverse shot and match on action. 

Jack's prelim evaluation


During filming we shot each scene twice to make sure we had a back up clip incase one of them didn't look correct or look natural, in an aim to make our scene look as natural as possible. This meant filming each clip from different angles and through editing choose the best one. 

Continuity editing was important to create one continuous motion, making it look realistic instead of having one clip following the person, making it look unprofessional. For example, entering and exiting the door had to be done in three takes as to make it look continuous, without following the person, we had to film on the inside of the door; the person approaching
the door, pushing the handle, and the outside; the person with their hand on the handle, to show the continuous motion from the clip before hand, and walking out of the door.

We aimed to make the prelim a mystery/ gangster theme and through editing we were able to add corresponding music when editing, fitting the mood, creating a flowing atmosphere.


We have conformed to match on action, a rule of continuity editing, as we showed the continuous movement of the character opening the door and walking through, which looked fluent. Through the look of the one swift movement, created through editing to make the opening of the door and the walking through the door, look like it was in the same movement. This is done to look effective and realistic to the audience watching.

Through following the shot reverse shot rule, usually used during a conversation, we made the talking between the two characters look natural, which is easy on the eye of the person watching. By using over the shoulder shots, and the 180 degree rule, when both characters are faced directly opposite each other, a conversation is carried out and through editing, it is slick and fast.

We conformed to the 180 degree rule to make the audience feel at ease with the story. By following the rule, we made sure that the camera position was was on one side of the actors, as we didn't want to confuse the audience, because when seeing both sides of the characters in a scene, it would be confusing and hard to understand for the audience.


Friday, 21 November 2014

Jack, Stacio and Ben's prelim


Dylan - Preliminary Task


Dylan - 1 minute film (The Deal)


The purpose of our 1 minute film was to showcase the skills we had learnt from a lesson we had with a professional who came in for the day to teach us how to record using the cannon cameras and how to edit them in final cut pro. In that lesson we also learnt about the importance of following the rule of thirds, adjusting the white balance and how to use manual focus to create depth of field.

What we can take from this lesson:
- Always use manual focus as auto focus will result in constant readjusting
- Make sure the white balance is set manually as the camera needs to know which colours are white
- How to use different shot types (not shown in 1 min film)
- How to use match on action to make create verisimilitude

Thursday, 20 November 2014

Jack, Stacio and Ben's- 1minute film (The Stalker)

From doing this 1 minute film we have learnt how to set white balance up on the cannon cameras. White balance is the process where you give information to the camera so that it removes unrealistic colour casts, so that objects which appear white in person are white in the photo/video. Camera white balance has to take into account the colour temperature of a light source, which refers to the relative warmth of coolness of white light. 

We have also learnt how to create suspense by not giving the audience all the information.Suspense can be created through almost any element of a story, including the title, characters, plot, time restrictions and word choice. We created suspense by not showing the stalker face. This was effective as it made the viewer want to watch out to see who he was and what was going to happen next.

Welcome

Welcome To Group 8s Blog

Dylan Evans 4283
Stacio Fernandes 4293
Jack Gilbert 4301